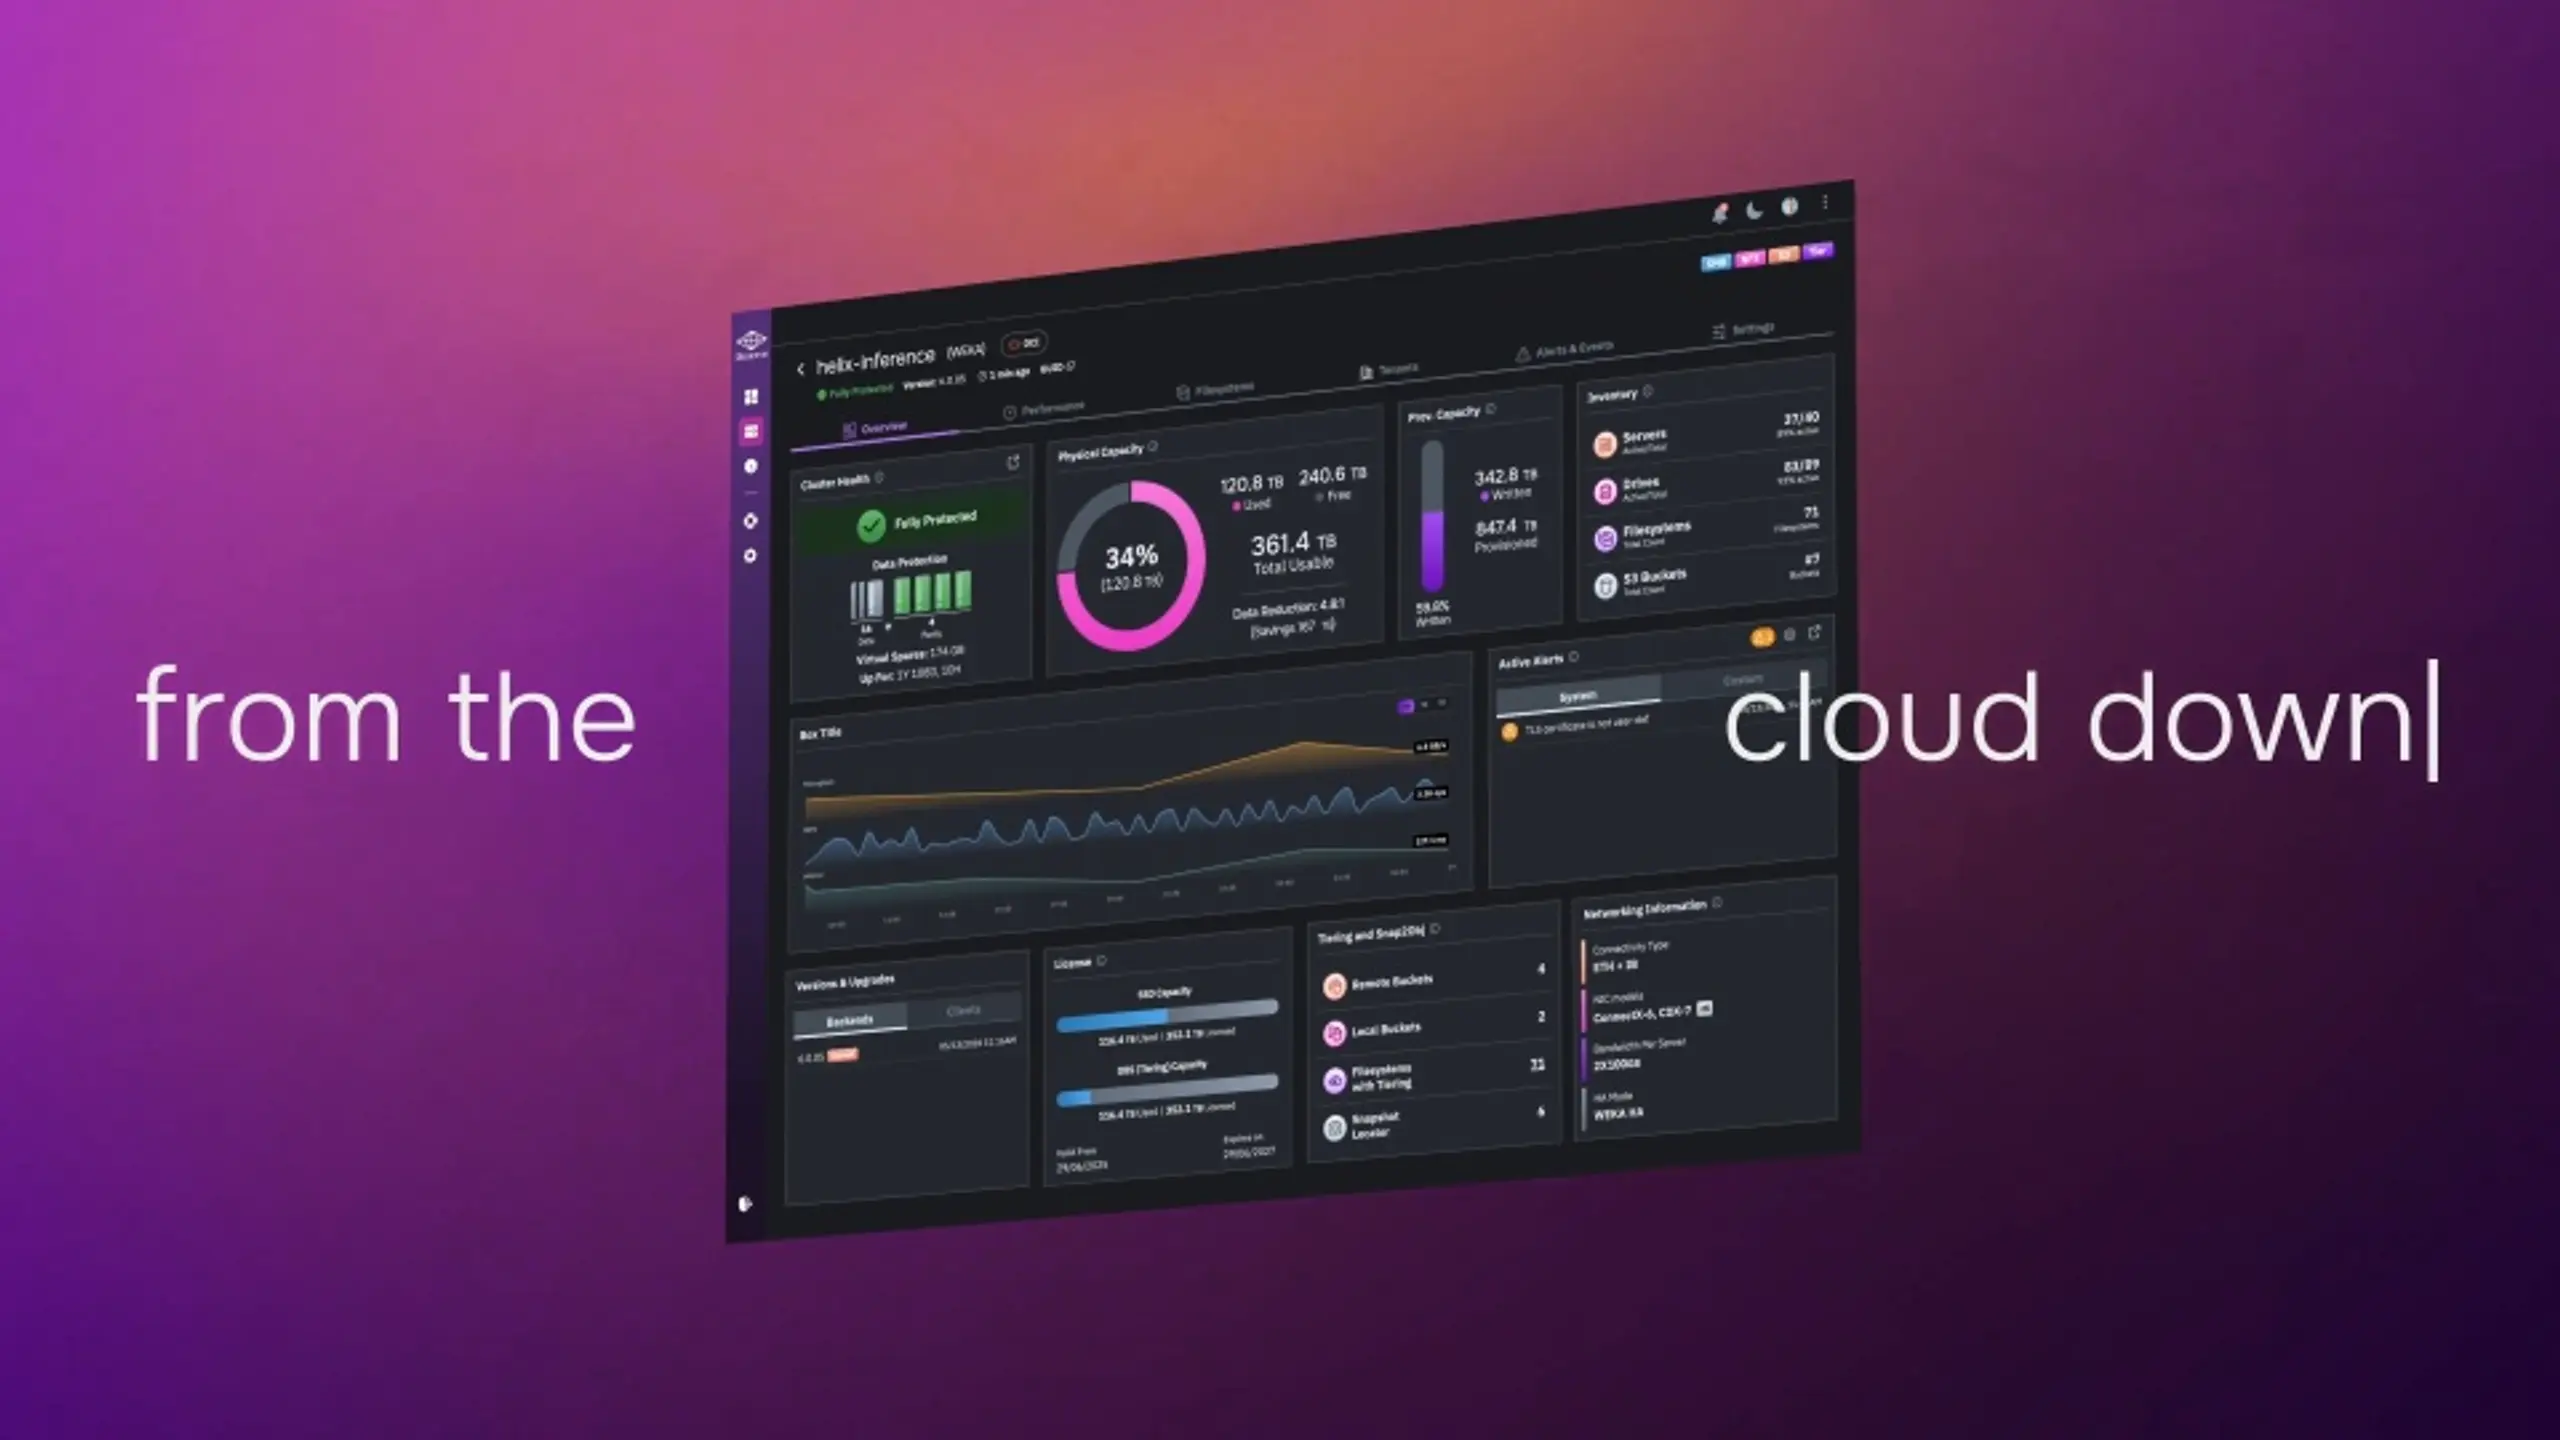
WEKA Data Reduction
A demonstration of WEKA data reduction technology including how to configure it and space savings from using it.
A demonstration of WEKA data reduction technology including how to configure it and space savings from using it.
What's Next
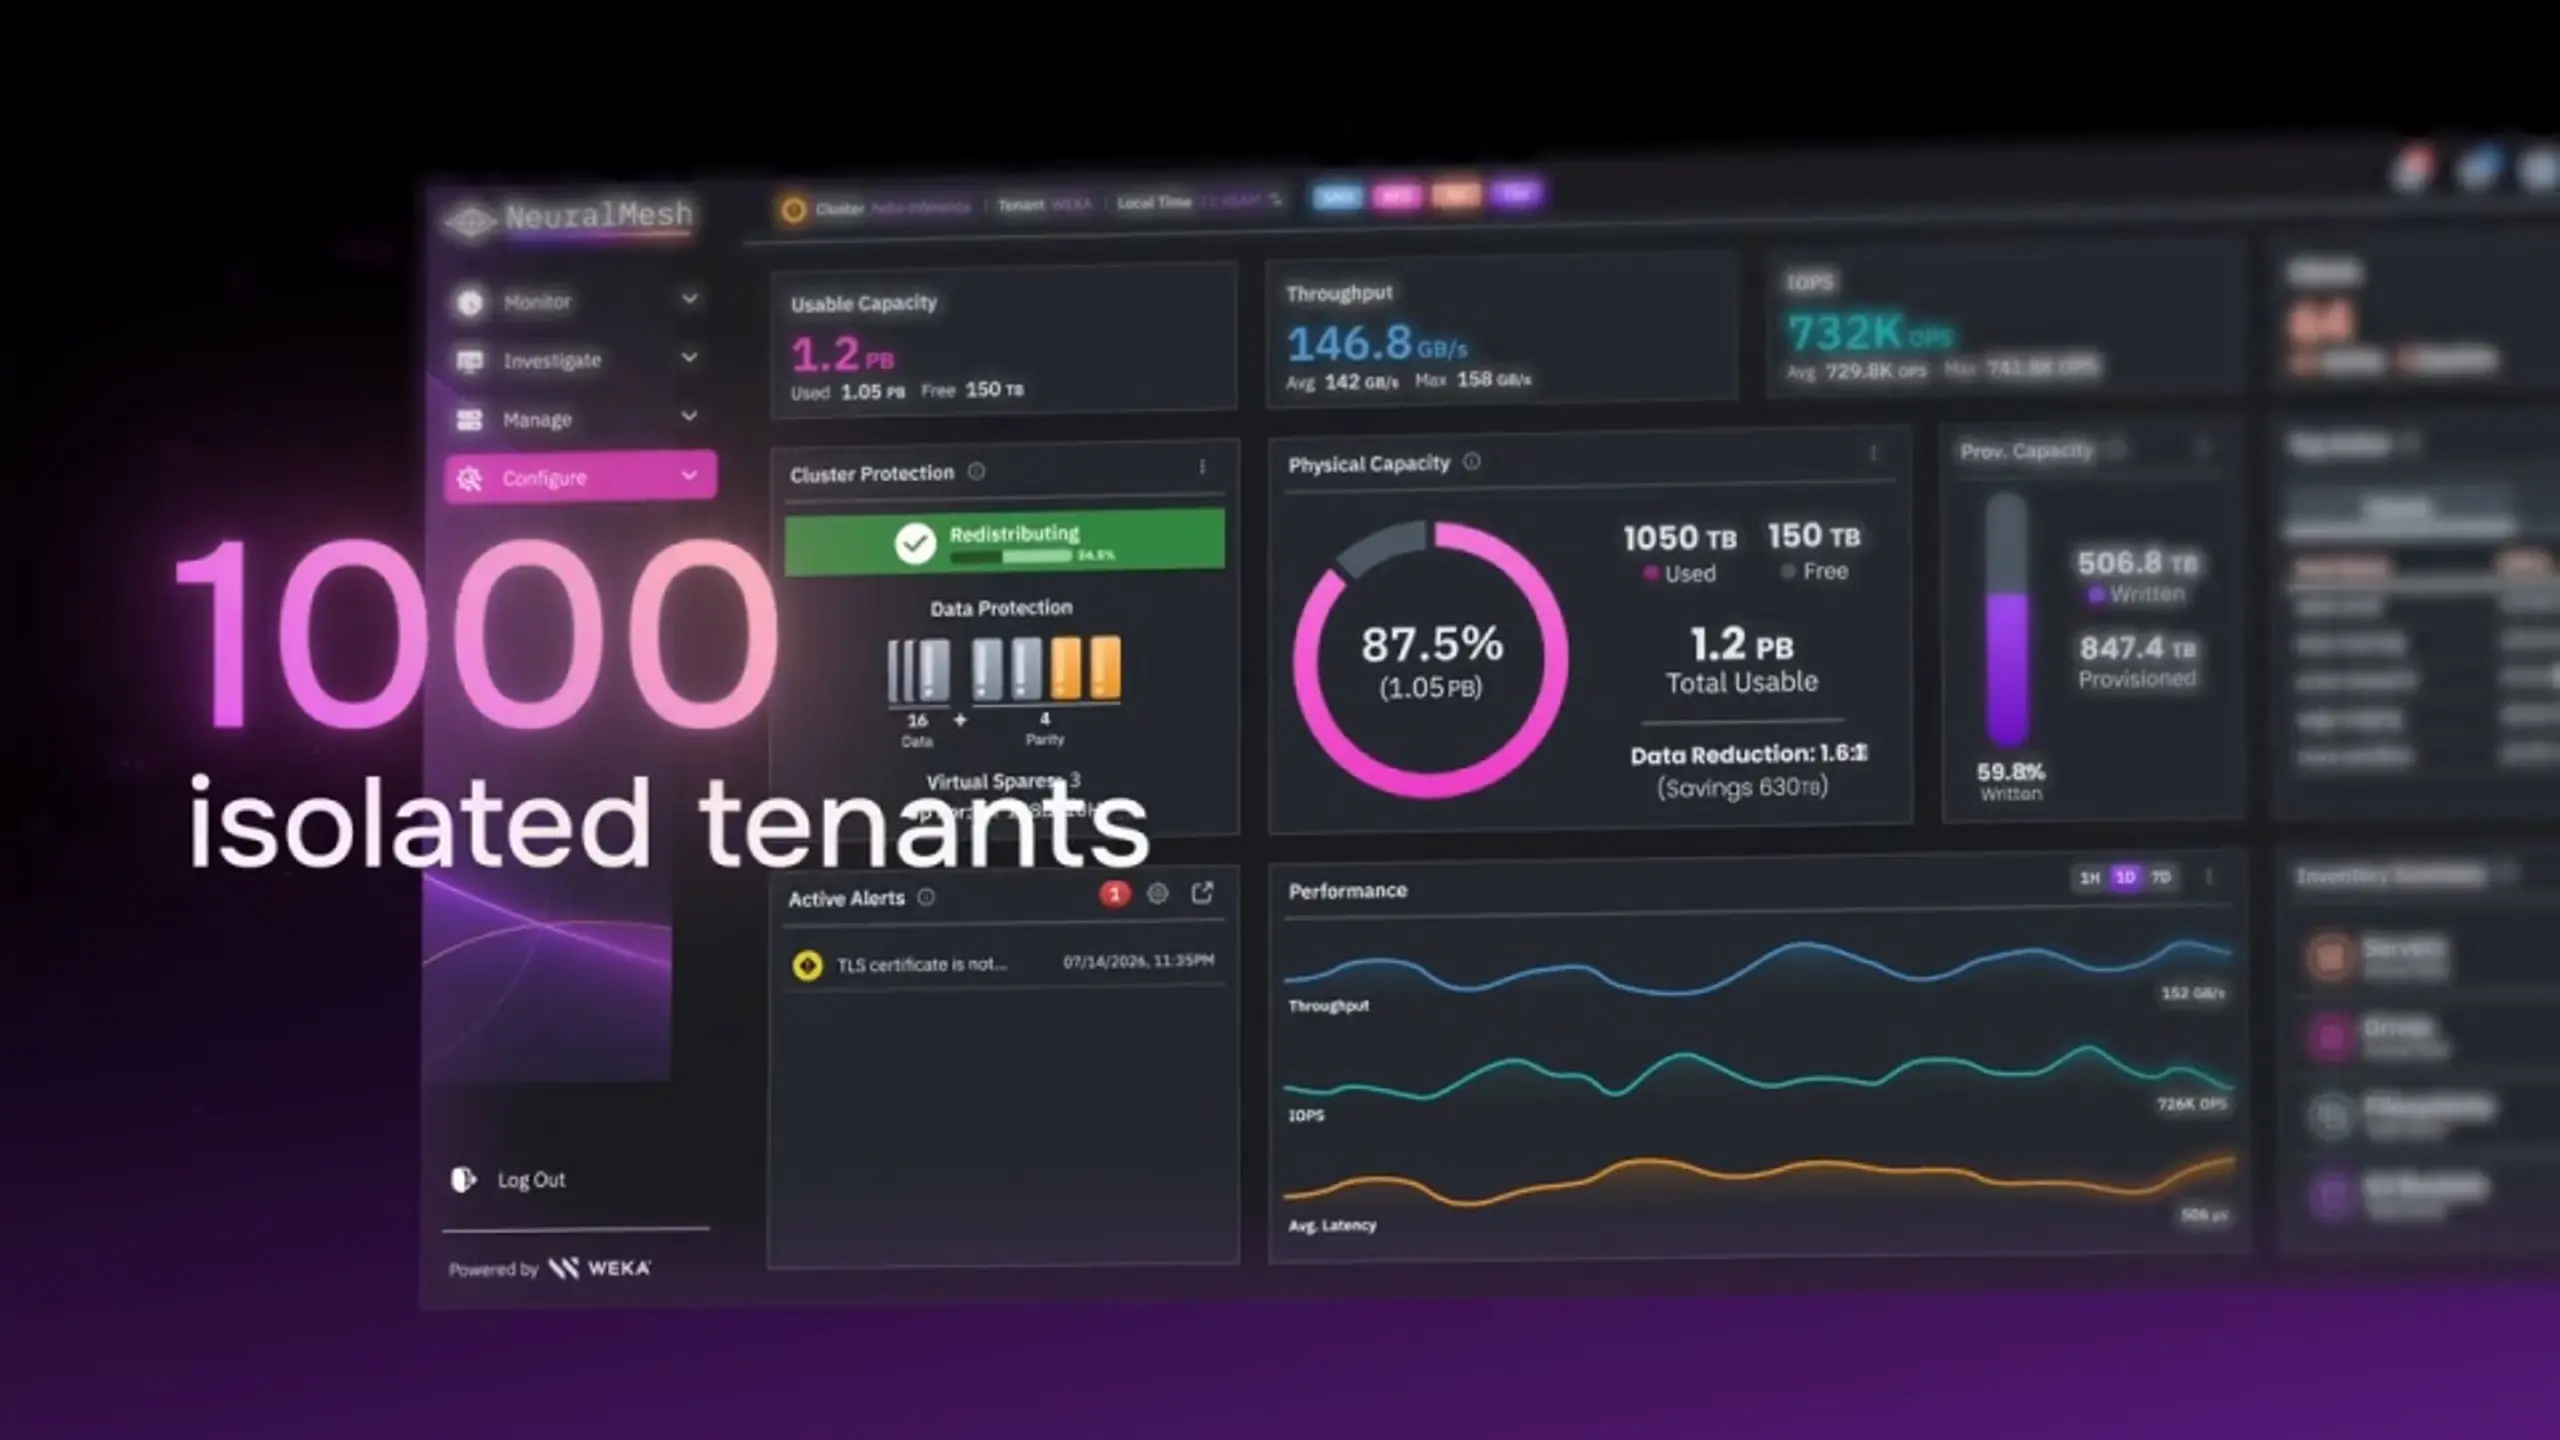
Scale Production AI Faster with NeuralMesh
Your models aren't slow. Your data is. Fix AI bottlenecks with high-throughput infrastructure.